
 Continue With Google
 continue with facebook


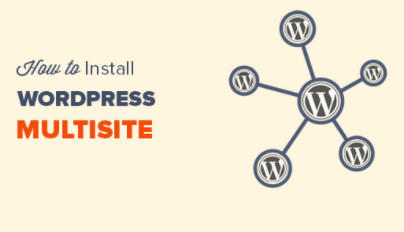
Introduction to function to manage multiple sites fastly
table of contents
Enable site network
1.1 Add menu “Set up site network”
1.2 Create site network
1.3 Change configuration file
Add a new website
Install theme-change theme for each website
Finally
Introduction to function to manage multiple sites fastly, Enable site network
Introduction to function to manage multiple sites fastly, In order to use the multi-site function of WordPress, it is necessary to enable the site network .
A site network is a bundle of multiple websites.
If you enable the site network, you will be able to display and operate the site network management screen in addition to the existing site management screen.
On the site network management screen, you can add websites to WordPress and make cross-cutting settings for multiple websites.
The procedure for activating the site network is a bit complicated, but once you get used to it, it can be completed in about 5 minutes, so please remember it.
Introduction to function to manage multiple sites fastly, Addition of menu “Installation of site network”
Introduction to function to manage multiple sites fastly, First, change the installed WordPress configuration file so that it will be displayed on the site network management screen.
The files to be edited this time (wp-config.php, .htaccess) are important files for running WordPress, so make a backup in advance so that you can recover them if you make a mistake and they stop working.
First, that’s all
you need to edit / * in wp-config.php ! Enjoy your blog on WordPress.
Add the following line just before the comment * / .
wp-config.php
~ Abbreviation ~
define ( ‘WP_DEBUG’ , false );
define ( ‘WP_ALLOW_MULTISITE’ , true );
/ * That’s all you need to edit! Enjoy your blog on WordPress. * /
~ Abbreviation ~
After changing wp-config.php, please log in to the WordPress administration screen.
A menu called “Install Site Network” has been added to the menu “Tools” on the left, so click it.
Introduction to function to manage multiple sites fastly, Site network installation
1.2 Creating a site network
Click to open the “Create WordPress Site Network” screen.
* When you open this screen, you will be warned that the plugins are enabled, so please stop all plugins from the “Plugins” menu.
Introduction to function to manage multiple sites fastly, Creating a WordPress site network
Introduction to function to manage multiple sites fastly, The site network name will be “Site Network 1” this time. Give it a descriptive name.
For the email address of the site network administrator, enter your email address.
Click the “Install” button when you are finished.
1.3 Modifying the configuration file
Introduction to function to manage multiple sites fastly, When the site network creation is completed, the screen will automatically move to the “Site network is being activated” screen. Change the setting file as instructed.
The contents to be changed differ depending on each environment, so the following is an example.
wp-config.php
~ Abbreviation ~
define ( ‘WP_DEBUG’ , false );
define ( ‘WP_ALLOW_MULTISITE’ , true );
define ( ‘MULTISITE’ , true );
define ( ‘SUBDOMAIN_INSTALL’ , false );
define ( ‘DOMAIN_CURRENT_SITE’ , ‘ ●●●●●●●●●● .secure.ne.jp’ );
define ( ‘PATH_CURRENT_SITE’ , ‘/ wp /’ );
define ( ‘SITE_ID_CURRENT_SITE’ , 1 );
define ( ‘BLOG_ID_CURRENT_SITE’ , 1 );
/ * That’s all you need to edit! Enjoy your blog on WordPress. * /
~ Abbreviation ~
.htaccess
# BEGIN WordPress
< IfModule Mod_rewrite . C >
RewriteEngine On
RewriteBase / wp /
RewriteRule ^ index \ . php $ -[ L ]
# add a trailing slash to / wp-admin
RewriteRule ^ ([ _ 0 – 9A – ZA – Z -] Tasu ? /) Wp-Admin Dorudoru 1Wp-Admin / [ R = 301 , L ]
RewriteCond % { REQUEST_FILENAME } – f [ OR ]
RewriteCond % { REQUEST_FILENAME } – d
RewriteRule ^-[ L ]
RewriteRule ^ ([ _ 0 – 9A – ZA – Z -] ? Tasu /) ( Wp – ( Content | Admin | Includes .) *) $ 2 [ L ]
RewriteRule ^ ([ _ 0 – 9A – ZA – Z -] ? Tasu /) (. * . \ Php ) Dorudoru 2 [ L ]
RewriteRule . Index . Php [ L ]
</ IfModule >
# END WordPress
After changing the configuration file, log out from the management screen and log in again.
If “Participating Sites” is added to the menu bar at the top of the dashboard, activation of the site network is complete.
Change configuration file
Introduction to function to manage multiple sites fastly, Add a new website
Introduction to function to manage multiple sites fastly, Let’s add a new website by using the multi-site function of WordPress .
Since you can add or delete websites from the site network management screen, first move to the site network management screen. If you place the cursor on “Participating Sites” in the menu bar at the top of the management screen, the menu “Site Network Management” will be displayed at the top, so click on it.
When you go to the site network management screen, there is a menu called “Site” in the menu bar on the left. Clicking on it will bring up a list of websites.
Currently only one default website URL is displayed.
When you click the “Add New” button on the upper left, the form screen “Add Site” will be displayed, so enter the information of the website you want to add here.
Introduction to function to manage multiple sites fastly, Add new site
Introduction to function to manage multiple sites fastly, For the site address (URL), think about the subdirectory of the website you want to add.
The site address is very difficult to change later, so think carefully and set it.
The site title is the title of the website you want to add. You can easily change this later.
For the administrator email address, enter the email address of the currently logged-in user.
When you have finished entering all the information, click the “Add Site” button.
Site list screen
If the URL of the added website is displayed on the website list screen, you are done.
Introduction to function to manage multiple sites fastly, Install theme-Change theme for each website
Introduction to function to manage multiple sites fastly, One of the advantages of multi-site is that the themes and plugins installed on the site network management screen can be used on each website.
This time, let’s change the theme of the newly added website in 2. to make the difference between the two websites stand out.
First, select “Theme”-> “Add New” from the site network management screen to add your favorite theme. The method of adding the theme is the same as usual WordPress.
Introduction to function to manage multiple sites fastly, After enabling it on the site network, go to the management screen of the newly added website (/ site2).
If you place the cursor on “Administrative Site” on the top menu bar, the site title registered in 2 will be displayed under “Site Network Management”. Click on it.
Just like in normal WordPress, select “Appearance”-> “Themes” to display the themes installed on the site network. Please enable them.
Top page of the first website without changing the theme
Top page of the first website without changing the theme
http: // <domain name> / wp /
Top page of the second website with a different theme
Top page of the second website with a different theme
http: // <domain name> / wp / site2 /
As you can see, the theme changes made on the admin screen of each site are reflected only on that site.
Introduction to function to manage multiple sites fastly, Finally
Introduction to function to manage multiple sites fastly, This time, I explained about the multi-site function of WordPress, enabling and initializing the site network, how to read the site network management screen, and how to add a website.
Multi-site has various functions other than being able to manage multiple websites with one WordPress.